 Skip to content
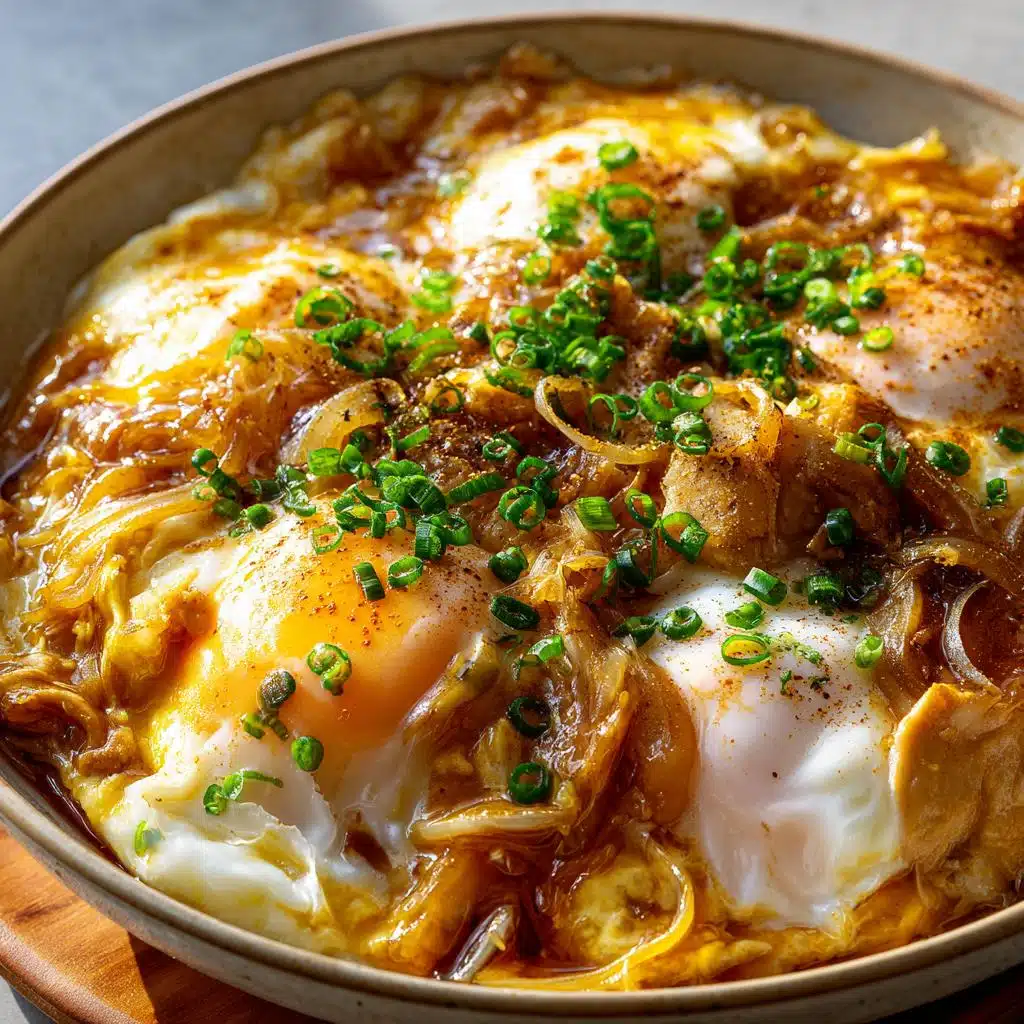
There’s something magical about Japanese chicken oyakodon egg rice casserole that instantly warms your soul. The first time I tried it at a tiny Tokyo eatery, I was hooked—the silky eggs hugging tender chicken, all swimming in that savory-sweet broth over steaming rice. It’s the ultimate comfort food that comes together in minutes but tastes like it simmered for hours.
Oyakodon literally means “parent-and-child bowl,” which always makes me smile—the chicken and eggs cooking together in perfect harmony. My version keeps things simple with just a handful of ingredients, letting the umami-rich dashi broth shine. When I’m craving something cozy yet effortless, this is my go-to dish. The aroma alone transports me back to that first bite in Japan!
Why You’ll Love This Japanese Chicken Oyakodon Egg Rice Casserole
This dish is pure magic—here’s why it’ll become your new weeknight hero:
- Ready in 25 minutes flat—faster than takeout, but so much tastier
- Perfectly balanced flavors—savory, slightly sweet, and deeply comforting
- Family-friendly—even picky eaters go crazy for the silky egg and tender chicken combo
- One-pan wonder—minimal cleanup means more time to actually enjoy your meal
Trust me, once you try this cozy bowl, you’ll understand why Japan adores oyakodon!
Ingredients for Japanese Chicken Oyakodon Egg Rice Casserole
Gathering the right ingredients is half the battle won for perfect oyakodon! Here’s exactly what you’ll need – I’ve learned through trial and error that precision matters with this dish. Don’t worry, everything’s easy to find at any Asian market or well-stocked grocery store.
- 200g boneless, skinless chicken breast – thinly sliced against the grain (trust me, this makes all the difference in tenderness)
- 4 large eggs – lightly beaten with some yolk streaks still visible (fresh eggs give that dreamy silky texture)
- 1/2 medium onion – thinly sliced (I use yellow onions for their sweetness)
- 1 cup dashi stock – homemade if you’re fancy, instant works great too (this is the flavor backbone!)
- 2 tbsp soy sauce – regular or light, but NOT dark soy sauce (it would overpower everything)
- 1 tbsp mirin – that sweet Japanese cooking wine (if you’re in a pinch, 1/2 tbsp sugar + 1/2 tbsp water works)
- 1 tbsp sugar – balances the saltiness perfectly
- 2 cups cooked Japanese short-grain rice – freshly steamed is ideal, but day-old works if you reheat it right
- 1 green onion – finely chopped for that fresh pop of color and flavor
See? Nothing too crazy! Just quality ingredients prepped right. Pro tip: slice your chicken when it’s slightly frozen – makes getting those perfect thin slices a breeze.
How to Make Japanese Chicken Oyakodon Egg Rice Casserole
Okay, let’s get cooking! The magic of oyakodon happens in stages – rush it and you’ll miss that perfect harmony of textures. I’ve burned enough eggs to know timing is everything here. Follow these steps, and you’ll have restaurant-quality results right at home.
Preparing the Broth
First, grab your favorite skillet (I use a 10-inch non-stick) and set it over medium heat. Pour in that glorious dashi stock – the smell alone will make your kitchen smell like a Tokyo izakaya. Add the soy sauce, mirin, and sugar, stirring gently until the sugar dissolves completely. This takes about 30 seconds – don’t let it boil yet! You’re building layers of flavor here.
Cooking the Chicken and Eggs
Now toss in those beautiful onion slices. Let them soften for about 2 minutes – they should be translucent but still have some bite. Slide in your chicken pieces in a single layer (no piling up!). Simmer for 3-4 minutes until the chicken turns opaque – poke a piece to check.
Here’s the fun part: drizzle those lightly beaten eggs over everything like you’re painting a canvas. Don’t stir! Just cover the pan immediately and count to 90 seconds. Peek – the eggs should be just set but still gloriously wobbly. Turn off the heat and let residual cooking finish the job while you plate your rice.
Pro tip: For extra silky eggs, pull the pan off the heat 10 seconds early. The carryover cooking is your best friend here!
Expert Tips for Perfect Japanese Chicken Oyakodon Egg Rice Casserole
After making this dish more times than I can count (and yes, messing it up plenty too!), I’ve learned a few secrets that’ll guarantee your oyakodon turns out absolutely dreamy every single time.
- Egg freshness matters! Older eggs tend to get rubbery when cooked – you want that luxurious, custardy texture only fresh eggs can deliver. Crack one open first – if the yolk stands tall and the white stays compact, you’re golden.
- Don’t walk away from those eggs! Set a timer for 90 seconds when you cover the pan. One minute too long and you’ll lose that beautiful silky flow. The eggs should jiggle slightly when you nudge the pan – they’ll finish setting from residual heat.
- Taste your broth before adding eggs. Everyone’s sweet spot differs – I like mine balanced, but you might prefer more savory. Adjust sugar by the 1/4 teaspoon until it sings to you. Remember, the rice will mellow everything out.
- Serve IMMEDIATELY. This isn’t a make-ahead dish – the eggs continue cooking in the hot broth. Have your rice bowls warmed and ready to go the moment those eggs are perfectly set.
Oh! One last thing – if your first attempt isn’t perfect, don’t stress. Even my “failed” versions still taste amazing over rice. The beauty of oyakodon is that it’s forgiving – just adjust and try again!
Common Variations of Japanese Chicken Oyakodon
While I adore the classic version, sometimes I mix things up! Try these easy swaps when you’re feeling adventurous:
- Tofu oyakodon – silken tofu replaces chicken for a vegetarian twist
- Brown rice base – adds nutty depth (just steam it extra fluffy)
- Chicken thighs – richer flavor if you prefer dark meat
- Mushroom lovers – shiitakes add amazing umami
The beauty? The method stays the same – just swap your star ingredient!
Serving Suggestions for Japanese Chicken Oyakodon Egg Rice Casserole
Now comes my favorite part – plating up this beauty! Presentation matters almost as much as taste with oyakodon. I always serve it in deep, wide bowls that show off all those gorgeous layers. Here’s how I make it a complete meal:
First, fluff your rice with a fork and mound it slightly to one side – this creates the perfect “nest” for the chicken and egg mixture. When you ladle that golden broth over the top, it’ll cascade down the rice in the most appetizing way. Scatter those chopped green onions over everything – the pop of color makes it irresistible!
For sides, I keep it simple but thoughtful:
- Miso soup – the classic pairing that balances the richness
- Quick-pickled cucumbers
- Steamed greens – spinach or bok choy add freshness
- Extra garnishes – sometimes I sprinkle shichimi togarashi for a spicy kick
– their tangy crunch cuts through the savory flavors
Pro tip: Have everything prepped and ready before you cook the eggs. That way, you can assemble bowls lightning-fast while the eggs are at their absolute peak. I learned this the hard way after one too many “Oh no, my eggs overcooked while I was plating!” moments.
And don’t forget the chopsticks! There’s something magical about breaking into that custardy egg layer and watching it spill over the rice. Pure comfort in every bite.
How to Store and Reheat Japanese Chicken Oyakodon
Okay, confession time – oyakodon is absolutely best fresh, but I totally get that life happens! If you must store leftovers (and trust me, I’ve been there), here’s how to keep them tasting as good as possible without turning those beautiful eggs into rubber.
First, cool it completely before storing – I spread mine in a shallow container so it chills faster. Pop it in the fridge with a tight lid, and try to eat it within 2 days max. The rice? Store that separately if you can – it gets weirdly hard when refrigerated with the saucy topping.
Now, reheating is where most people go wrong! Never microwave oyakodon – those eggs will toughen up instantly. Instead, I gently warm the chicken-egg mixture in a skillet with a splash of water or extra dashi over low heat, stirring occasionally just until heated through. It’ll never be quite as silky as fresh, but this method saves the texture better than anything else I’ve tried.
For the rice, I sprinkle a few drops of water over it and microwave in 30-second bursts, fluffing between each. Then I reassemble everything fresh – rice first, then the reheated topping, and a fresh sprinkle of green onions to brighten it up.
Honestly? I usually just make single servings fresh – the whole dish comes together so fast! But when leftovers are unavoidable, these tricks help salvage that comforting oyakodon magic.
Nutritional Information for Japanese Chicken Oyakodon Egg Rice Casserole
Now, I’m no nutritionist, but I’ve done enough label-reading to know what’s in my favorite comfort foods! Here’s the breakdown per serving – keep in mind these are estimates since ingredients vary (my grandma’s chicken was always plumper than mine!).
- Calories: About 450 per generous bowl
- Protein: 30g (thanks to all that chicken and eggs!)
- Carbs: 55g (mostly from that delicious short-grain rice)
- Fat: 12g (the good kind from eggs and chicken)
- Sugar: 8g (mostly from the mirin and touch of sugar in the broth)
- Sodium: 900mg (soy sauce packs a punch – use reduced-sodium if needed)
What I love is how balanced this meal feels – you’re getting quality protein, energizing carbs, and just enough fat to keep you satisfied. It’s way lighter than most takeout but still feels indulgent. Pro tip: If you’re watching sodium, you can cut the soy sauce by a tablespoon and add an extra splash of dashi – still tasty!
Remember, these numbers shift based on your exact ingredients. My Tokyo friend’s version uses more mirin (sweeter!), while my health-conscious sister swaps brown rice and skips the sugar entirely. The beauty of oyakodon is how adaptable it is to different diets!
Frequently Asked Questions About Japanese Chicken Oyakodon
I get so many questions about this dish! Here are the ones that pop up most often – with answers I’ve tested in my own kitchen through plenty of trial and error.
Can I use chicken thighs instead of breast?
Absolutely! In fact, many traditional Japanese cooks prefer thighs for their richer flavor and juiciness. Just slice them slightly thinner since they take a tad longer to cook. The fat renders beautifully into the broth – it’s like a flavor booster! My trick? Briefly marinate thigh slices in a bit of the soy-mirin mixture before cooking to ensure even seasoning.
Is mirin essential?
Mirin adds that signature sweet depth, but don’t panic if you’re out! In a pinch, mix 1/2 tablespoon sugar with 1/2 tablespoon water (or sake if you have it). It won’t be identical, but still delicious. That said – once you taste real mirin’s complexity, you’ll want to keep a bottle handy! I buy the “hon-mirin” (real mirin) for best results – it lasts forever in the pantry.
How do I prevent overcooked eggs?
Oh boy, this was my biggest struggle at first! The secret? Remove the pan from heat when eggs look 90% done – they’ll finish cooking from residual heat. I set a timer for exactly 90 seconds after covering. Also, beat the eggs just enough to blend yolks and whites, but leave some streaks – overbeaten eggs turn rubbery. And NEVER lift the lid to peek – that steam is your cooking ally!
Got more questions? Hit me up anytime – I could talk oyakodon tricks all day!
Print
25-Minute Japanese Chicken Oyakodon Egg Rice Casserole Worth Craving
- Total Time: 25 mins
- Yield: 2 servings
- Diet: Low Calorie
Description
A comforting Japanese dish where chicken and eggs are simmered together in a savory broth, then served over steamed rice.
Ingredients
- 1 boneless, skinless chicken breast (200g), thinly sliced
- 4 large eggs
- 1/2 onion, thinly sliced
- 1 cup dashi stock
- 2 tbsp soy sauce
- 1 tbsp mirin
- 1 tbsp sugar
- 2 cups cooked Japanese short-grain rice
- 1 green onion, chopped (for garnish)
Instructions
- Heat dashi stock, soy sauce, mirin, and sugar in a pan over medium heat.
- Add sliced onion and cook until slightly softened.
- Add chicken pieces and simmer until cooked through.
- Beat eggs lightly and pour over the chicken mixture.
- Cover and cook until eggs are just set but still slightly runny.
- Divide rice between bowls and top with the chicken and egg mixture.
- Garnish with chopped green onion.
Notes
- Use fresh eggs for best texture.
- Adjust sugar to taste if you prefer less sweetness.
- Serve immediately while hot.
- Prep Time: 10 mins
- Cook Time: 15 mins
- Category: Main Dish
- Method: Simmering
- Cuisine: Japanese



