 Skip to content

Oh my gosh, you have to try this Maple-Glazed Chicken & Root Vegetables – it’s the perfect cozy dinner that comes together in one pan! I first made this when I needed something hearty but easy after a long day, and now it’s in my weekly rotation. The sweet maple glaze caramelizes beautifully on the chicken while the root veggies get all tender and golden underneath. My husband always jokes that it tastes like Sunday supper but cooks like a weeknight miracle. Seriously, that sweet-savory balance? Absolute magic. And the best part? It’s basically foolproof – even my 8-year-old can help toss everything together!
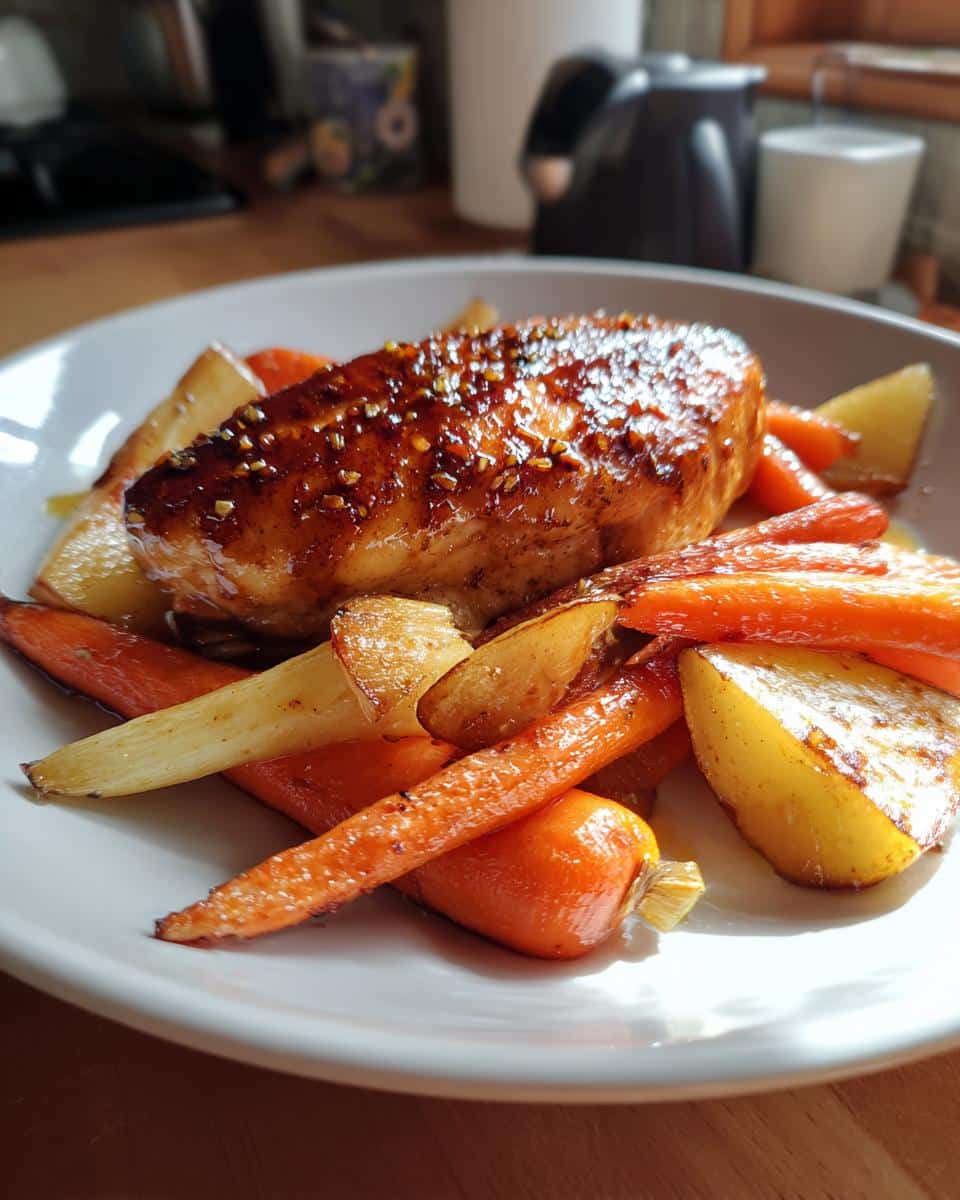
Why You’ll Love This Maple-Glazed Chicken & Root Vegetables
Trust me, this dish is about to become your new weeknight hero. Here’s why:
- One-pan wonder: Everything roasts together—minimal prep, even less cleanup
- Sweet meets savory: That maple-Dijon glaze? Pure harmony on your taste buds
- Meal-prep friendly: Tastes just as good reheated next day (if it lasts that long!)
- No fancy skills needed: Just chop, toss, and let the oven do its magic
Ingredients for Maple-Glazed Chicken & Root Vegetables
Here’s everything you’ll need to make this cozy dish sing – and trust me, using fresh, quality ingredients makes all the difference! I’ve learned the hard way that pre-diced veggies from the store just don’t caramelize the same way. Grab these:
For the Vegetables
- 2 cups diced carrots (about 3 medium, cut into ½-inch chunks – bigger pieces hold up better during roasting)
- 2 cups diced parsnips (peeled first! They’re starchier than carrots, so same ½-inch dice)
- 1 cup diced sweet potatoes (leave the skin on for extra nutrients and texture)
- 2 tbsp olive oil (the good stuff – it helps everything get that golden crispiness)
For the Chicken
- 4 boneless, skinless chicken breasts (about 1.5 lbs total – try to get them similar thickness so they cook evenly)
For That Magic Maple Glaze
- ¼ cup pure maple syrup (none of that pancake syrup stuff – the real deal has deeper flavor)
- 1 tbsp Dijon mustard (my secret weapon – adds tang that balances the sweetness)
- 1 tsp garlic powder (trust me, powder works better than fresh here – no burnt bits!)
- 1 tsp dried thyme (rub it between your fingers first to wake up the oils)
- Salt and pepper (I use about ½ tsp kosher salt and ¼ tsp black pepper)
Pro tip from my many test batches: measure your maple syrup in the same cup after the oil – the residual oil helps it slide right out!
How to Make Maple-Glazed Chicken & Root Vegetables
Alright, let’s get cooking! This recipe flows so smoothly once you get going – just follow these simple steps, and you’ll have a gorgeous, glazed dinner ready in no time. I promise it’s easier than it looks!
Step 1: Prep the Vegetables
First things first – preheat that oven to 375°F (190°C). While it’s heating up, grab your carrots, parsnips and sweet potatoes. Cut them into nice, even ½-inch chunks – this size roasts up perfectly, getting tender inside while crisping at the edges. Toss them all together in a big bowl with the olive oil, plus a good pinch of salt and pepper. You want every piece lightly coated – I like to use my hands to really massage that oil in there!
Step 2: Season and Arrange Chicken
Now take your chicken breasts – if they’re super thick, give them a little pound to even them out (I just use my fist, no fancy mallet needed!). Sprinkle both sides lightly with salt and pepper. Spread those beautiful oiled veggies in a single layer on your baking sheet (line it with parchment if you’re smart like me – easy cleanup!), then nestle the chicken right on top. This way, all those delicious juices drip down as it cooks!
Step 3: Make the Maple Glaze
Here’s where the magic happens! In a small bowl, whisk together the maple syrup, Dijon mustard, garlic powder and thyme until it’s completely smooth. No lumps allowed! The consistency should be like a thin pancake batter – if it’s too thick, add just a teaspoon of warm water to loosen it up. Now grab a pastry brush (or spoon in a pinch) and generously coat each chicken breast with that glossy glaze. Don’t forget to drizzle some over the veggies too – that’s where you’ll get those irresistible caramelized bits!
Step 4: Bake to Perfection
Pop that tray in the oven and let the magic happen for 25-30 minutes. You’ll know it’s ready when the chicken reaches 165°F (74°C) inside (meat thermometer for the win!) and the veggies are fork-tender with golden edges. If your glaze isn’t quite sticky enough, broil for just 1-2 minutes at the end – but watch it like a hawk so it doesn’t burn! Let it rest 5 minutes before serving, then dig into that perfect sweet-savory harmony.

Tips for Perfect Maple-Glazed Chicken & Root Vegetables
After making this dish more times than I can count, I’ve picked up some tricks that take it from good to “wow!” Here are my can’t-live-without tips:
- Thermometer is key: Chicken can go from juicy to dry in minutes – I swear by an instant-read thermometer to hit that perfect 165°F (74°C) every time
- Veggie size matters: Keep all pieces around ½-inch – any bigger and they won’t cook through, any smaller and they’ll turn to mush
- Glaze twice for extra flavor: Brush on half the glaze before baking, then add the rest during the last 10 minutes for maximum sticky goodness
- Sheet pan real estate: Spread everything in a single layer with space between pieces – overcrowding makes veggies steam instead of roast
- Parsnip swap: Not a parsnip fan? Try turnips or extra sweet potatoes instead – just adjust roasting time if using harder veggies
And my golden rule? Let it rest 5 minutes after baking – that glaze thickens up perfectly as it cools slightly!
Variations for Maple-Glazed Chicken & Root Vegetables
Oh, the fun you can have with this recipe! Swap maple syrup for honey if you’re in a pinch (though the flavor changes completely – in a good way!). Throw in Brussels sprouts or beets with the root veggies for extra color. Chicken thighs work beautifully too – just add 5 extra minutes to the bake time. Get creative!
Serving Suggestions
This dish shines all on its own, but I love serving it over a bed of fluffy quinoa or brown rice to soak up that glorious glaze. A sprinkle of fresh thyme or parsley adds a pop of color and freshness right at the end – trust me, it makes all the difference!
Storage & Reheating
Here’s the scoop on keeping your Maple-Glazed Chicken & Root Vegetables tasting just as amazing tomorrow (if there’s any left!). Slide any leftovers into an airtight container – they’ll keep beautifully in the fridge for up to 3 days. For longer storage, freeze portions in freezer-safe bags for 2-3 months (though the veggies lose a bit of texture).
Now, reheating is where most folks go wrong – don’t you dare use the microwave unless you want soggy veggies! My foolproof method? Spread everything on a baking sheet and pop it in a 350°F (175°C) oven for 10-15 minutes until heated through. The glaze gets sticky again and the chicken stays juicy. If things look dry, a quick drizzle of fresh maple syrup before reheating works wonders. Pro tip: freeze individual portions in the glaze for ready-to-bake meals on crazy nights!
Nutritional Information
Now, let’s talk numbers – but remember, these are estimates based on my standard ingredient sizes, so your exact counts might dance around a bit depending on your maple syrup brand or how big those chicken breasts run!
Per serving (that’s 1 chicken breast + a hearty scoop of veggies):
- Calories: Around 350 (that sweet maple syrup adds just enough indulgence)
- Protein: A solid 30g from the chicken – keeps you full for hours
- Carbs: About 35g (mostly from those nutrient-packed root veggies)
- Fiber: 5g – thank you, carrot and parsnip skins!
- Sugar: 15g (natural sugars from the maple and sweet potatoes)
- Fat: 10g total, with only 2g saturated (that olive oil does good work)
What I love most? This meal gives you serious bang for your nutritional buck – lean protein, vitamin-rich veggies, and just enough sweetness to feel like comfort food without the guilt. My fitness-obsessed brother calls it “meal prep gold”!
Common Questions About Maple-Glazed Chicken & Root Vegetables
I’ve gotten so many questions about this recipe over the years – here are the big ones that keep popping up from friends and readers alike. Trust me, I’ve tested all these scenarios myself!
Can I use frozen vegetables instead of fresh?
Oh honey, I’ve tried – and while it works, it’s just not the same. Frozen veggies release too much water during roasting, so you end up with steamed rather than caramelized goodness. If you’re in a pinch, thaw and pat them bone-dry first, then roast at 400°F for extra crispiness. But fresh is always worth the extra chopping time for that perfect texture!
How can I adjust the sweetness level?
This one’s easy! For less sweetness, cut the maple syrup to 2 tablespoons and add 1 extra tablespoon of Dijon mustard – that tang balances it beautifully. Want it sweeter? Add an extra drizzle of syrup during the last 5 minutes of baking. My neighbor swears by adding a teaspoon of balsamic vinegar to the glaze for complex sweetness that’s not cloying.
What if I don’t have parsnips?
No sweat – this recipe is crazy flexible. Swap in extra carrots, try golden beets for earthiness, or even diced butternut squash. Just keep an eye on harder veggies like rutabaga – they might need 5 extra minutes in the oven. My Aunt Judy uses all sweet potatoes and calls it her “candy chicken” version!
Can I prep this ahead of time?
Absolutely! Here’s my make-ahead trick: Chop all the veggies and store them dry in a bag (no oil yet!). Mix the glaze ingredients in a jar. When ready to cook, just toss veggies with oil, arrange with chicken, and brush on that glaze. Takes the 4 PM “what’s for dinner?” panic down to 5 minutes flat!
Why is my glaze burning before the chicken cooks through?
Been there! Two fixes: First, tent foil loosely over the chicken for the first 20 minutes, then remove to finish browning. Second, try baking at 350°F instead – slower cooking prevents that sugar from getting too dark too fast. And always, always use the middle oven rack – top rack equals burnt glaze city!
Try This Maple-Glazed Chicken & Root Vegetables Tonight!
Don’t just take my word for it – grab those root veggies and chicken breasts, and make this cozy dish happen in your kitchen tonight! I swear, that first bite of sticky-sweet chicken with those caramelized veggies will have you hooked. This is the kind of meal that makes weeknights feel special without any fuss. Snap a photo of your creation and tag me – I live for seeing your kitchen wins! Now go preheat that oven and get ready for the easiest, most delicious dinner you’ll make all week. Happy cooking, friends!
Print
25-Minute Maple-Glazed Chicken & Root Vegetables – Heavenly Comfort
- Total Time: 45 minutes
- Yield: 4 servings
- Diet: Low Fat
Description
A hearty and flavorful dish featuring tender chicken and roasted root vegetables coated in a sweet maple glaze.
Ingredients
- 4 boneless, skinless chicken breasts
- 2 cups diced carrots
- 2 cups diced parsnips
- 1 cup diced sweet potatoes
- 1/4 cup maple syrup
- 2 tbsp olive oil
- 1 tbsp Dijon mustard
- 1 tsp garlic powder
- 1 tsp dried thyme
- Salt and pepper to taste
Instructions
- Preheat oven to 375°F (190°C).
- Toss carrots, parsnips, and sweet potatoes with olive oil, salt, and pepper. Spread on a baking sheet.
- Place chicken breasts on top of the vegetables.
- Mix maple syrup, Dijon mustard, garlic powder, and thyme in a bowl. Brush over chicken and vegetables.
- Bake for 25-30 minutes until chicken is cooked through and vegetables are tender.
- Serve warm.
Notes
- Use fresh root vegetables for best results.
- Adjust maple syrup to taste for sweetness.
- Check chicken internal temperature reaches 165°F (74°C).
- Prep Time: 15 minutes
- Cook Time: 30 minutes
- Category: Main Course
- Method: Baking
- Cuisine: American



