 Skip to content

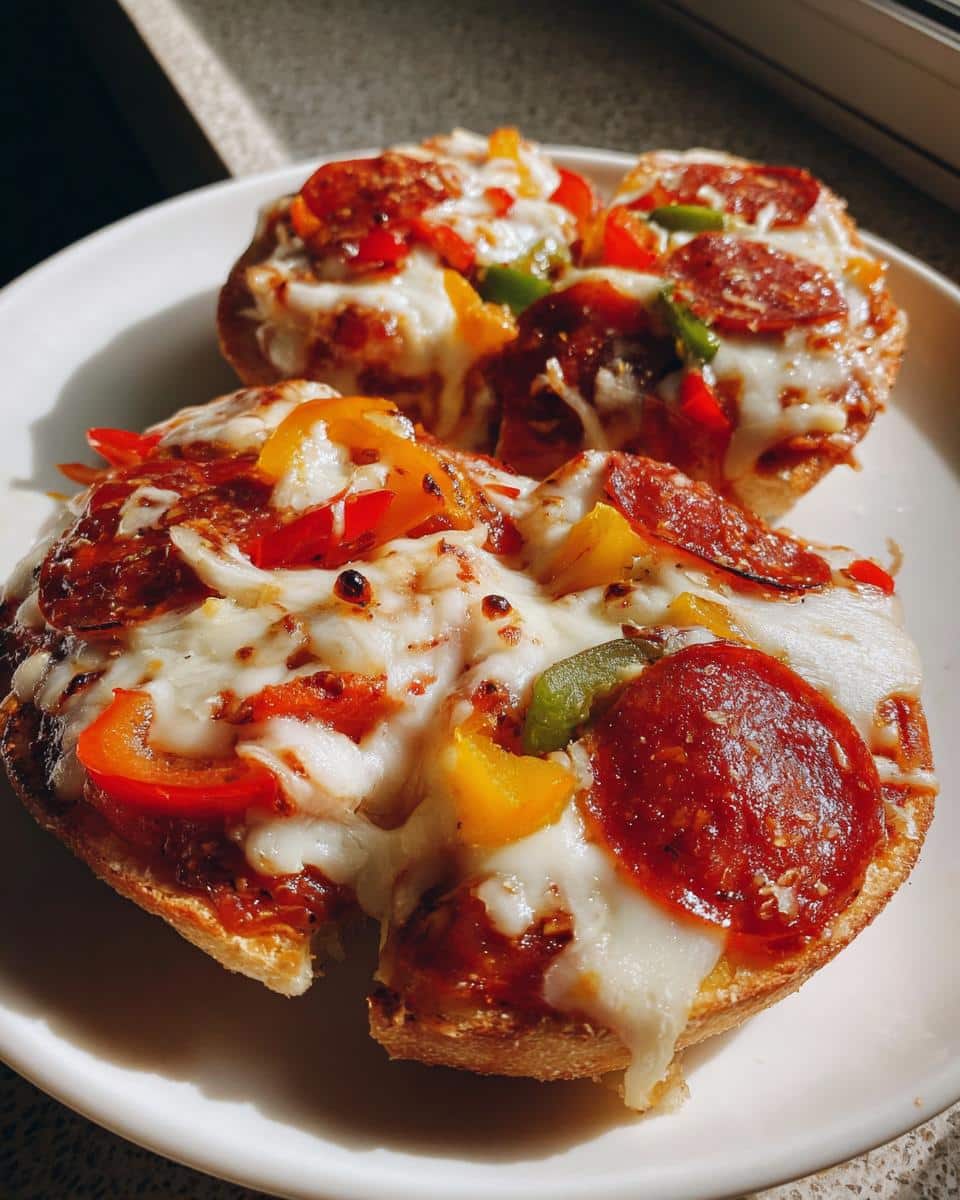
Remember those store-bought pizza lunchables we all loved as kids? Well, let me tell you – the homemade version is even better! There’s something magical about watching my daughter’s face light up when she opens her lunchbox to find these fresh, bubbly mini pizzas waiting for her. I started making these DIY Pizza Lunchables during the pandemic when grocery runs became tricky, and now they’re our go-to school lunch staple. The best part? They take less time to make than driving to the store, and you know exactly what’s going into them. No mystery ingredients here – just crispy little pizza rounds loaded with whatever toppings make your crew happy.

Ingredients for DIY Pizza Lunchables
Here’s everything you’ll need to whip up these adorable little pizzas – I promise it’s all stuff you probably have on hand already! The beauty of this recipe is how flexible it is, but these are my tried-and-true favorites:
- For the dough: 1 cup of your favorite pizza dough (homemade or store-bought)
- For the sauce: 1/2 cup pizza sauce (I like the jarred kind for convenience)
- The cheesy goodness: 1 cup shredded mozzarella cheese (freshly grated melts best!)
Topping ideas:
- 1/4 cup sliced pepperoni (cut into quarters for kid-sized bites)
- 1/4 cup thinly sliced bell peppers (any color works)
- 1/4 cup sliced mushrooms (I like cremini for extra flavor)
See? Told you it was simple! Now let’s get those mini masterpieces assembled.
How to Make DIY Pizza Lunchables
Okay, let’s turn these simple ingredients into something magical! I’ve made these little pizzas so many times I could probably do it in my sleep, but don’t worry – I’ll walk you through every step. The key is taking your time with the prep work. Rushing leads to lopsided pizzas (ask me how I know!).

Prep the Dough and Toppings
First, dust your counter with just a bit of flour – too much and your dough gets tough. Roll out the pizza dough to about 1/4 inch thickness. I use a drinking glass (about 3 inches across) to cut perfect little circles. The scraps? Just ball them up and re-roll – no waste here!
For toppings, slice everything small – we’re going for bite-sized perfection. I chop the pepperoni into quarters and make sure the veggies are sliced paper-thin so they cook quickly. Nobody wants raw mushrooms on their mini pizza!
Assemble and Bake
Now the fun part! Spoon about a teaspoon of sauce onto each dough circle, leaving a tiny border. Sprinkle with cheese (don’t skimp!), then arrange your toppings. Space them out – overcrowding leads to soggy centers.
Pop them in your preheated 400°F oven for exactly 10 minutes. You’ll know they’re ready when the cheese gets those gorgeous golden bubbles and the edges turn lightly brown. Let them cool for 5 minutes – I know it’s hard to wait, but piping hot cheese burns little mouths!
Tips for Perfect DIY Pizza Lunchables
After making hundreds of these little guys, I’ve picked up some tricks that make all the difference:
- Flour is your friend – A light dusting on your hands and rolling pin keeps sticky dough from becoming a frustration. Too much makes the crust tough though!
- Dry toppings = crispy crust – Pat those veggies dry with a paper towel before adding them. Wet mushrooms or peppers will steam your crust instead of letting it get that perfect crunch.
- Cool completely before packing – I know it’s tempting to pack them warm, but that steam will make the crust soggy by lunchtime. Let them sit for at least 15 minutes.
- Bake on parchment – No more stuck-on cheese disasters! The pizzas slide right off the baking sheet if you use parchment paper.
Follow these simple tips and your mini pizzas will come out restaurant-quality every single time!
Customizing Your DIY Pizza Lunchables
The best part about making these at home? You can mix and match ingredients based on what your family loves (or what’s hiding in your fridge)! Here are some of our favorite variations:
- Veggie lovers: Swap pepperoni for black olives, cherry tomatoes, or even roasted zucchini slices
- Gluten-free: Use your favorite GF pizza dough – the small size means it bakes perfectly every time
- Dairy-free: Vegan mozzarella shreds work great, or try hummus instead of cheese for a protein boost
- Breakfast twist: Scrambled eggs, bacon bits, and cheddar make amazing morning pizzas
Honestly, the possibilities are endless – get creative and make them your own!
Storing and Reheating
These little pizza gems keep beautifully in an airtight container for up to 2 days – any longer and the crust loses its magic crispness. When you’re ready to eat, pop them in a toaster oven at 350°F for about 3 minutes. That quick blast of heat brings back that fresh-from-the-oven crunch perfectly! For school lunches, I sometimes pack them cold – they’re still delicious at room temperature.
DIY Pizza Lunchables FAQs
I get asked about these little pizzas ALL the time, so let’s tackle the big questions:
Can I freeze DIY Pizza Lunchables?
Absolutely! Here’s my trick – assemble them unbaked on parchment-lined trays, freeze solid, then transfer to freezer bags. When ready, bake straight from frozen (just add 2-3 extra minutes). Perfect for those “oh no, I forgot lunch prep” mornings!
What are the best sauce substitutes?
While traditional pizza sauce works great, we love mixing it up! Pesto adds an herby punch, Alfredo makes them creamy-dreamy, and even marinara works in a pinch. My daughter’s favorite? A light smear of ranch dressing – don’t knock it till you try it!
Can I prep components ahead?
Totally! Chop all your toppings the night before and store them separately in little containers. The dough keeps refrigerated for up to 2 days too. Morning assembly takes just minutes when everything’s pre-prepped!
Nutrition Information
Just a quick note – these numbers can vary based on your exact ingredients (that fancy aged mozzarella adds more calories than part-skim!). A basic version runs about 250 calories per pizza, with sodium really depending on your cheese and pepperoni choices. Use this as a general guide, not gospel truth – we’re making memories here, not lab reports!
I’d love to see your DIY Pizza Lunchable creations! Snap a photo of your lunchbox masterpieces and tag me – nothing makes me happier than seeing the creative topping combinations you come up with. Did your kiddos go crazy for the pepperoni flowers? Did you sneak some unexpected ingredient that turned out amazing? Tell me all about it in the comments below! And if this recipe saved your busy school morning (or became your new favorite easy dinner), leave a quick rating to let others know. Happy pizza-making, friends – may your crusts always be crispy and your cheese perfectly melty!
Print
Irresistible DIY Pizza Lunchables in Just 10 Minutes
- Total Time: 22 minutes
- Yield: 4 servings
- Diet: Vegetarian
Description
A fun and easy way to make your own pizza lunchables at home. Perfect for kids and adults alike.
Ingredients
- 1 cup pizza dough
- 1/2 cup pizza sauce
- 1 cup shredded mozzarella cheese
- 1/4 cup sliced pepperoni
- 1/4 cup sliced bell peppers
- 1/4 cup sliced mushrooms
Instructions
- Preheat your oven to 400°F (200°C).
- Roll out the pizza dough and cut into small circles.
- Spread pizza sauce on each dough circle.
- Add shredded mozzarella cheese and your favorite toppings.
- Bake for 10-12 minutes until the crust is golden.
- Let cool before serving.
Notes
- You can customize toppings to your preference.
- Store leftovers in an airtight container for up to 2 days.
- Great for meal prep or school lunches.
- Prep Time: 10 minutes
- Cook Time: 12 minutes
- Category: Lunch
- Method: Baking
- Cuisine: Italian




I am pleased that I found this blog, just the right info that I was searching for! .