 Skip to content
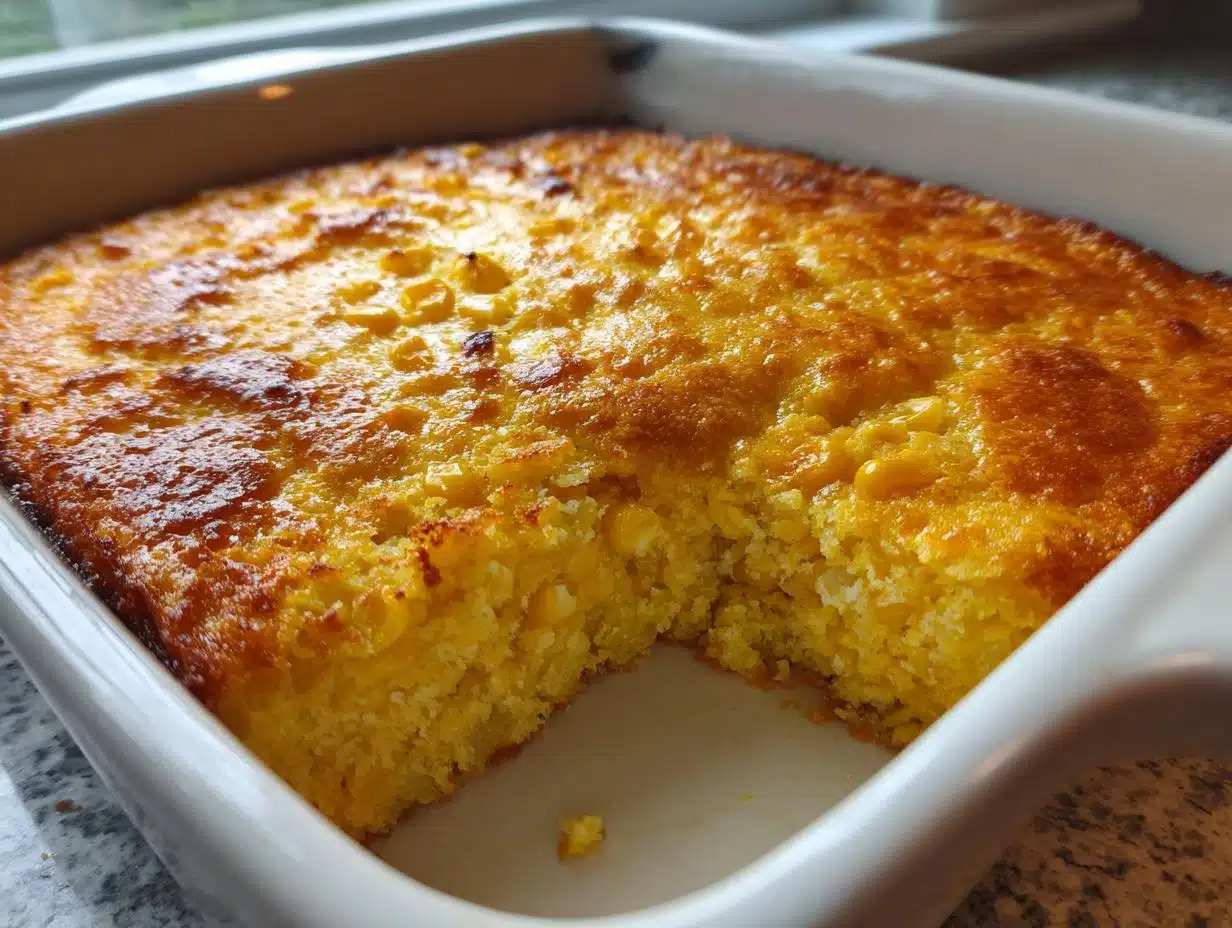
You know those days when you’re racing against the clock, juggling a million things, and still need to put a delicious side dish on the table? That’s exactly why I fell in love with this Make-Ahead Jiffy Corn Casserole (Prep Today, Bake Later). It’s been my secret weapon for holiday dinners, potlucks, and those “oops, I forgot to plan dinner” moments since my college days.
I’ll never forget the first time I threw this together before a last-minute Friendsgiving – it took me all of 10 minutes to mix up, then I popped it in the fridge until showtime. The compliments came rolling in, and nobody guessed how little effort it actually took! Now it’s my go-to when I need something comforting, crowd-pleasing, and stress-free.
What makes this recipe special? It’s the perfect balance of sweet corn, buttery richness, and that signature Jiffy mix flavor – all with the convenience of prepping whenever you have time and baking when you’re ready. Let me show you how simple it is to make magic happen with just a few basic ingredients!
Why You’ll Love This Make-Ahead Jiffy Corn Casserole
Oh, where do I even start? This casserole is like that reliable friend who always shows up when you need them most. Here’s why it’s become my kitchen MVP:
- 10-minute prep – Seriously, it takes longer to preheat the oven than to mix everything together!
- Pantry staples – Just grab a box of Jiffy mix and a couple cans from your cupboard.
- Busy-day lifesaver – Prep it during naptime, bake it at dinnertime. Magic.
- Crowd-pleasing comfort – That golden, buttery top? People go wild for it every single time.
Trust me, once you try this method, you’ll never stress about side dishes again!
Ingredients for Make-Ahead Jiffy Corn Casserole
Here’s the beautiful part – you probably have most of these ingredients in your pantry right now! I love recipes like this that don’t require any fancy shopping trips. Just gather these simple items (and yes, I’m giving you all my little prep secrets too):
- 1 box Jiffy corn muffin mix – That iconic blue box is the star of the show!
- 1 can (15 oz) whole kernel corn, drained – Give it a good shake in a colander – we want the corn flavor without extra liquid.
- 1 can (15 oz) cream-style corn – This is our secret moisture magic – don’t drain this one!
- 1 cup sour cream – Full-fat gives the best richness, but light works in a pinch.
- 1/2 cup melted butter (unsalted) – I melt mine in the microwave in 15-second bursts so it’s liquid but not scorching hot.
- 1 large egg, beaten – Crack it into a small bowl first and give it a quick whisk with a fork.
See? Nothing complicated here. Just six simple ingredients that come together to create something way greater than the sum of their parts. Now let’s get mixing!
Ingredients for Make-Ahead Jiffy Corn Casserole
Okay, let’s talk ingredients – and I promise, you probably have most of these in your kitchen right now! The beauty of this recipe is how simple everything is, but I’ve learned a few tricks about getting each component just right:
- 1 box Jiffy corn muffin mix – That iconic blue box is our foundation here. Don’t substitute other brands unless you’re ready for a texture change!
- 1 can (15 oz) whole kernel corn, drained – I give mine a good shake in a colander – you want those kernels plump but not swimming in liquid.
- 1 can (15 oz) cream-style corn – This is our secret moisture bomb. No draining needed – pour that glorious gloop right in!
- 1 cup sour cream – Full-fat gives the richest flavor, but light works in a pinch. Just don’t use fat-free – trust me on this.
- 1/2 cup melted butter (unsalted) – I microwave mine in 15-second bursts until just melted. And yes, it must be real butter – no substitutes!
- 1 large egg, beaten – Crack it into a small bowl first and give it a quick whisk – this helps everything incorporate evenly.
See? Nothing fancy, just good old-fashioned ingredients that work magic together. Now let’s get mixing!
How to Prepare Make-Ahead Jiffy Corn Casserole
Alright, let’s dive into the fun part – turning these simple ingredients into golden, bubbly perfection! I’ve made this casserole more times than I can count, and these are the steps that never fail me:
Step 1: Mix the Ingredients
First, grab your biggest mixing bowl – trust me, you’ll want the extra space. Dump in the Jiffy mix first (that cornmeal scent always takes me back to childhood!). Add the drained whole corn, cream-style corn straight from the can, sour cream, melted butter, and that beaten egg you prepped earlier.
Now, here’s my secret: use a sturdy wooden spoon and mix just until everything comes together. You’ll see streaks at first – that’s fine! About 30 seconds of gentle stirring should do it. Overmixing makes the texture tough, and we want that perfect tender crumb.
Step 2: Assemble and Store
Pour your glorious golden mixture into a greased 9×9-inch baking dish. I use butter for greasing – just swipe some around with a paper towel until the whole surface glistens. If you’re baking immediately, you’re ready to go! But if you’re prepping ahead (smart move!), cover tightly with foil and refrigerate.
Here’s a pro tip: write the baking temp and time on the foil with a Sharpie so you don’t forget later! This beauty keeps perfectly in the fridge for up to 24 hours – just give it a quick stir before baking if it’s been sitting overnight.
Step 3: Baking Instructions
When you’re ready to bake, preheat your oven to 350°F (175°C). No need to let the dish come to room temperature – it goes straight from fridge to oven! Bake uncovered for 45-50 minutes. You’ll know it’s done when the edges pull away slightly and the top turns that perfect golden brown.
Want to test? Stick a toothpick in the center – it should come out clean or with just a few moist crumbs. Let it rest for 5 minutes before serving (I know, the waiting is torture!). That brief rest helps everything set up beautifully.
Tips for Perfect Make-Ahead Jiffy Corn Casserole
After making this casserole more times than I can count (seriously, my family requests it weekly!), I’ve picked up some tricks that take it from good to “oh-my-goodness-I-need-the-recipe” great:
Greasing Like a Pro
Don’t skimp on greasing that baking dish! I learned this the hard way when half my beautiful casserole stuck to the pan. Now I use butter (never cooking spray) and really get into the corners. For extra insurance, you can line the bottom with parchment paper – just cut it to fit!
Crispy Top Secrets
Want that irresistible golden crust? Bake uncovered the whole time. If the top starts browning too fast (it happens with some ovens!), just tent loosely with foil during the last 10 minutes. For extra crunch, sprinkle a tablespoon of sugar over the top before baking – it caramelizes beautifully!
Cheese Lover’s Twist
My husband insists I add a handful of shredded cheddar to the batter now – and wow, does it take this casserole to another level! Stir in 1/2 cup sharp cheddar or sprinkle another 1/4 cup on top before baking. The cheese forms these little crispy edges that are absolutely addictive.
Texture Tricks
If your casserole seems too wet after mixing, let the batter sit for 5 minutes – the cornmeal will absorb some moisture. Too thick? Add a splash of milk until it reaches a pourable consistency. Remember, it thickens as it bakes!
The best part? This recipe forgives little mistakes. Too much butter? Still delicious. Forgot to drain the corn? Just bake a few minutes longer. That’s why I love it so much – it’s practically foolproof!
Storage and Reheating Instructions
Here’s the thing I love most about this casserole (besides how delicious it is) – it keeps and reheats like an absolute dream! I’ve tested every storage method imaginable, and here’s what works best:
Storing Leftovers in the Fridge
First, let your casserole cool completely – about an hour on the counter. Then cover it tightly with foil or transfer portions to airtight containers. It’ll stay fresh for 3-4 days in the fridge. The texture actually improves overnight as the flavors meld!
Freezing for Later
This casserole freezes beautifully! Cut cooled leftovers into portions, wrap each tightly in plastic wrap, then foil. Or freeze the whole thing in the baking dish (just wrap the whole dish in plastic first). It’ll keep for up to 3 months frozen. Pro tip: write the date on the foil so you don’t forget when you made it!
Reheating Like a Pro
For fridge leftovers, I prefer reheating in the oven at 350°F for about 15-20 minutes until heated through. Cover with foil if the top starts getting too dark. Microwave works in a pinch – just zap single portions for 1-2 minutes, stirring halfway.
Frozen? No problem! Thaw overnight in the fridge first, then bake at 350°F for 25-30 minutes. Or reheat straight from frozen (covered with foil) for about 45 minutes – add 10 extra minutes if your oven runs cool.
Fun fact: I’ve even eaten leftovers cold straight from the fridge at midnight – not that I’m admitting to anything! The texture holds up shockingly well no matter how you reheat it.
Variations for Make-Ahead Jiffy Corn Casserole
One of my favorite things about this recipe is how easily you can tweak it to match your mood or what’s in your fridge! Over the years, I’ve played around with countless variations – here are my absolute favorites that still keep things simple:
Spice It Up
For my friends who love a little kick, try stirring in a diced jalapeño (seeds removed if you’re sensitive to heat) or a pinch of cayenne pepper. My personal favorite? A can of diced green chiles – they add incredible flavor without too much heat. Just drain them well before adding!
Lighter Options
When I’m feeling a bit health-conscious, I swap the sour cream for plain Greek yogurt – the tang is similar, and it still keeps everything moist. You can also use half butter and half unsweetened applesauce if you want to cut some fat (though I’ll admit, the full-butter version is my weakness!).
Crunchy Toppings
For special occasions, I love adding texture with toppings. Try a handful of crushed Ritz crackers mixed with melted butter, or sprinkle some panko breadcrumbs over the top before baking. My neighbor swears by crushed cornflakes for extra crunch!
Cheese, Please!
While the classic version is perfect as-is, sometimes I can’t resist adding cheese. Sharp cheddar is my go-to, but pepper jack adds a nice zing. For something different, crumble some feta on top before baking – the salty tang pairs amazingly with the sweet corn.
Herb Garden Twist
In summer when my herb garden is overflowing, I’ll chop up a handful of fresh chives or parsley and stir them in. A teaspoon of dried thyme works wonders too – it adds this earthy note that makes the whole dish taste fancier with zero extra effort.
The best part? All these variations still work with the make-ahead method. Just assemble as usual, cover, and refrigerate until baking time. Honestly, I’ve never met a version of this casserole I didn’t like – it’s like the little black dress of side dishes, always appropriate and endlessly adaptable!
Nutritional Information
Now, I’m no nutritionist, but I know we all like to have a general idea of what we’re eating! Keep in mind these numbers are rough estimates – they’ll vary depending on your specific ingredients (especially if you add any of those delicious variations we talked about).
A typical serving (about 1/6 of the casserole) gives you a good balance of carbs, protein, and fats. The corn provides natural sweetness and fiber, while the eggs and dairy give it a protein boost. Of course, this is definitely comfort food territory – we’re not pretending it’s health food here!
The exact nutrition will change based on whether you use full-fat vs light sour cream, the brand of Jiffy mix you choose, or if you add any extra cheese or toppings. My advice? Enjoy it in moderation as part of a balanced meal – life’s too short not to savor that buttery corn goodness!
Frequently Asked Questions
Can I freeze this casserole before baking?
Absolutely! That’s one of my favorite things about this recipe. Just assemble as usual, cover tightly with plastic wrap and then foil (double protection is key!), and freeze for up to 3 months. When ready to bake, thaw overnight in the fridge first, then bake as directed – you might need to add 5-10 extra minutes since it’ll be colder.
Can I use fresh corn instead of canned?
You bet! I’ve done this in summer when sweet corn is at its peak. You’ll need about 2 cups of fresh kernels (cut from about 3 ears) to replace the canned corn. For the cream-style corn, blend 1 cup of fresh kernels with 1/4 cup milk or cream until you get a chunky puree. The texture will be slightly different but equally delicious!
Why does my casserole sometimes come out too wet?
Oh, I’ve been there! Usually it means either: 1) the whole kernel corn wasn’t drained well enough, or 2) your oven runs a bit cool. Next time, really shake that colander! If it still seems too moist after baking, just pop it back in for 5-10 more minutes uncovered. The extra time works wonders.
Can I make this in muffin tins for individual portions?
Yes, and they’re adorable! Grease a 12-cup muffin tin really well (I use butter in every nook), fill cups about 2/3 full, and bake at 375°F for 18-22 minutes. Perfect for parties or when you want built-in portion control. They freeze beautifully too – just wrap cooled muffins individually.
What can I substitute if I don’t have Jiffy mix?
In a pinch, you can use another cornbread mix, but the texture will be different – Jiffy has that perfect balance. If you must substitute, try 3/4 cup cornmeal + 1/2 cup flour + 1 tbsp sugar + 2 tsp baking powder + 1/2 tsp salt. It won’t be identical, but it’ll still taste good!
Now It’s Your Turn!
Alright, my fellow busy cooks – I’ve shared all my secrets, now it’s time for you to work your magic! Whip up this Make-Ahead Jiffy Corn Casserole for your next gathering (or just because Tuesday night deserves something special). I’d absolutely love to hear how it turns out for you!
Did you add any fun twists? Maybe some jalapeños for kick or extra cheese because… well, cheese? How did your family react when they took that first bite? Snap a photo of your golden creation and tell me all about it – nothing makes me happier than seeing this recipe bring joy to other kitchens just like it has in mine for years. Happy baking, friends!
Print
Easy 10-Minute Make-Ahead Jiffy Corn Casserole Recipe
- Total Time: 60 minutes
- Yield: 6 servings
- Diet: Vegetarian
Description
A quick and easy make-ahead corn casserole using Jiffy mix. Prep it today and bake it later for a delicious side dish.
Ingredients
- 1 box Jiffy corn muffin mix
- 1 can (15 oz) whole kernel corn, drained
- 1 can (15 oz) cream-style corn
- 1 cup sour cream
- 1/2 cup melted butter
- 1 egg
Instructions
- Preheat oven to 350°F (175°C).
- In a large bowl, mix all ingredients until well combined.
- Pour the mixture into a greased 9×9-inch baking dish.
- Cover and refrigerate if making ahead, or bake immediately for 45-50 minutes until golden brown.
- Let cool for 5 minutes before serving.
Notes
- Store unbaked casserole in the fridge for up to 24 hours before baking.
- For a crispier top, bake uncovered.
- Add shredded cheese on top before baking for extra flavor.
- Prep Time: 10 minutes
- Cook Time: 50 minutes
- Category: Side Dish
- Method: Baking
- Cuisine: American



